Wednesday, February 25, 2015

Archive the Weblogic configuration through WLST script


By enabling the Archive , the AdminServer can automatically backup the domain configuration .
ConfigArchive.py

adminurl=’t3://localhost:7001’

adminuser=’weblogic’

adminpass=’welcome123’

connect(adminuser,adminpass,adminurl)

domainRuntime()

edit()

startEdit()

cmo.setConfigurationAuditType('logaudit')

cmo.setConfigBackupEnable(true)

cmo.setArchiveConfiguration(250)

save()

activate()

exit()


Once the script is executed , we can validate the change by navigating to weblogic admin console –>Domain on left panel->Advance in General configuration
When ever admin server starts the domain configuration is automatically backup/archive into config-original.jar and once admin server is started properly  it makes backup of DOMAIN_HOME/config directory and stores it in DOMAIN_HOME/config-booted.jar

Oracle Wallet Manager Cert creation/import


Steps to generate cert wallet request from Oracle Wallet Manager (OWM)

Set the variables to enable windows launch.

  1. Goto /oracle/app/product/fmw/web/bin
  2. Launch ./owm

clip_image002

  1. Select Wallet and click on New
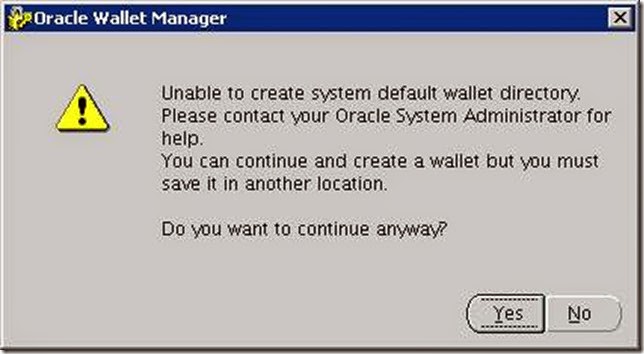
  2. Select Yes in the below window

clip_image004

  1. Enter the passcode for the wallet

clip_image006

  1. Select Yes

clip_image008

7. Fill in the details as below

clip_image010

A certificate request will be created.

clip_image012

  1. Select Operations from menu and Export Certificate request to export the request to a file.

clip_image014

9. Save the wallet from Wallet menu.

10. Set AutoLogin enabled

11. Save the wallet again and exit.

12. Send the csr details to get a certificate.

13. Once the certificate is received, place the certificate and trusted certificate (mrsca.der) in the wallet path (/oracle/app/certs).

14. Launch owm

15. Select “Import Trusted Certificate” from Operations menu.

clip_image016

clip_image018

clip_image020

16. Now import user certificate received. Check the status of Certificate which will change to “Ready” once the cert is imported.

clip_image022

clip_image024

How to Enable and configure the Sama on Solaris Servers


1. root|@socsos>/usr/sfw/sbin/smbd -V
Version 3.0.28

2. Check is Samba is running.
root|@socsos> svcs -a | grep samba
disabled       Sep_20   svc:/network/samba:default

3. Enable samba.
root|@socsos> svcadm enable svc:/network/samba:default
root|@socsos> svcs -a | grep samba

4. /usr/sfw/bin/testparm

5. create /etc/sfw/smb.conf file
Add the following lines

[global]
        workgroup = <any name you like> For example AOCV4
    log file = /var/adm/samba/samba_log.%m
    security = SHARE
    smb passwd file = /etc/sfw/private/smbpasswd


6. For read access only
[share from OCSOSAP7]
path = /data/TMPVIS11/appl
comment = AOCv4 Samba Share
guest ok = Yes
read only = Yes


7. For read and write access only
[share from OCSOSAP7]
path = /data/TMPVIS11/comn/java
comment = AOCv4 Samba Share
force user = webuser
force group = web
read only = No
guest ok = Yes
create mask = 0755
directory mask = 0755

8. Verify folder permission and ownership
All file permission should 775
Check file ownership and change permissions if needed.

svcadm restart svc:/network/samba:default

How to Setup FTP Service on Windows Server 2008


To install the FTP service on Windows Server 2008

1. On the Start menu, click Administrative Tools, and then click Server Manager.

2. In the Server Manager Pane, in the Roles Summary section, click Web Server (IIS).

3. In the Web Server (IIS) section, click Add Role Services.

4. Under Role services, select FTP Publishing Service. This will install the FTP service and the FTP management console.

5. Click Next, and then click Install.

Configure The FTP Service

To configure the FTP Service to allow only anonymous connections, follow these steps:

1. Start Internet Information Services Manager or open the IIS snap-in.

2. Expand Server_name, where Server_name is the name of the server.

3. Expand FTP Sites

4. Right-click Default FTP Site, and then click Properties.

5. Click the Security Accounts tab.

6. Click to select the Allow Anonymous Connections check box (if it is not already selected), and then click to select the Allow only anonymous connections check box.
When you click to select the Allow only anonymous connections check box, you configure the FTP Service to allow only anonymous connections. Users cannot log on by using user names and passwords.

7. Click the Home Directory tab.

8. Click to select the Read and Log visits check boxes (if they are not already selected), and then click to clear the Write check box (if it is not already cleared).

9. Click OK.

How to Upgrade WebCenter Portal 11.1.1.6


Web Center Portal 11.1.1.6 Upgrade:

This post explains the process of upgrading the webcenter portal 11.1.1.6 version.

Steps:

  • Shutdown the whole weblogic domain and nodemanager.
  • Take back up of the WCP database schemas.

Note:- Make sure this back up includes the schema version registry table, as each Fusion Middleware schema has a row in this table. The name of the schema version registry table is SYTEM.SCHEMA_VERSION_REGISTRY$

  • Take back up of the FMW binaries. (/oracle/app/product/fmw folder)
JDK installation:
  • jrockit-jdk1.6.0_24 version is required for weblogic 10.3.5
  • Copy the folder from /oracle/source/OFM11gR1/jrockit-jdk1.6.0_24 to /oracle/app
Weblogic Patching:

à Run the below command to install weblogic 10.3.5:

/oracle/app/jrockit-jdk1.6.0_24/bin/java -Djava.io.tmpdir=/oracle/app -Xms256m -Xmx512m -jar /oracle/source/OFM11gR1/wls1035_upgrade_generic.jar -mode=silent -silent_xml=/oracle/app/wls1035_generic.xml

Where /oracle/app/wls1035_generic.xml is a customized version of /oracle/source/OFM11gR1/wls1035_generic.xml

WCP upgrade to 11.1.1.6 from 11.1.1.4:

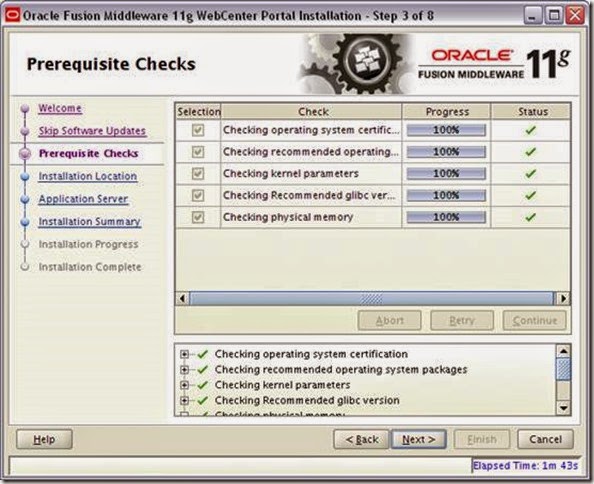
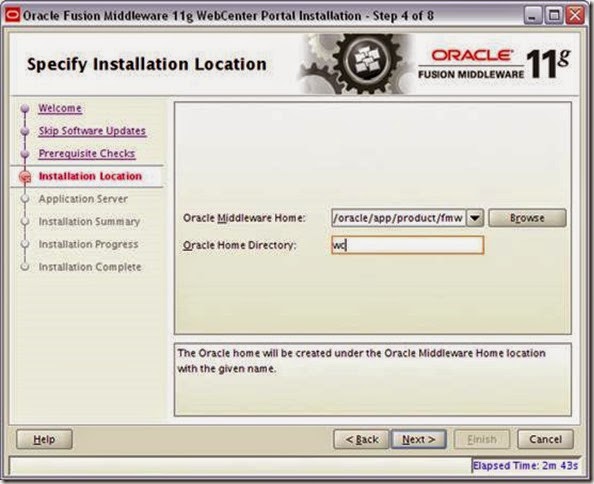
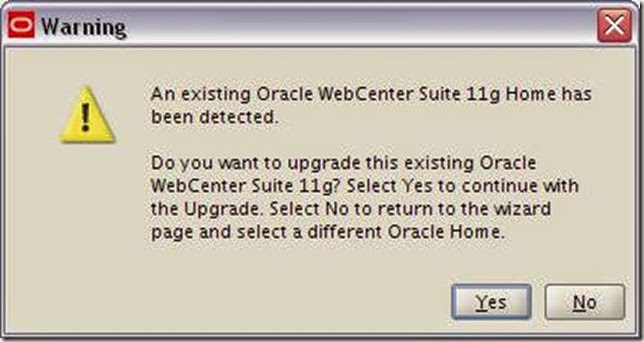
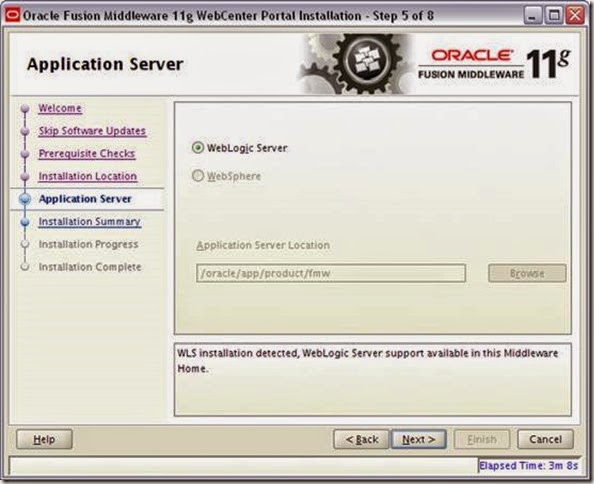
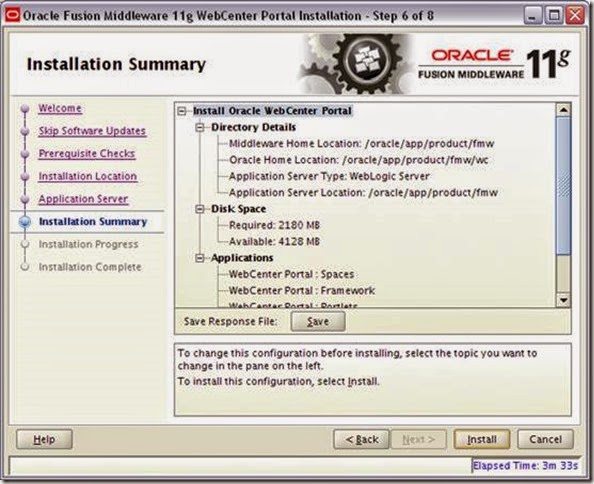
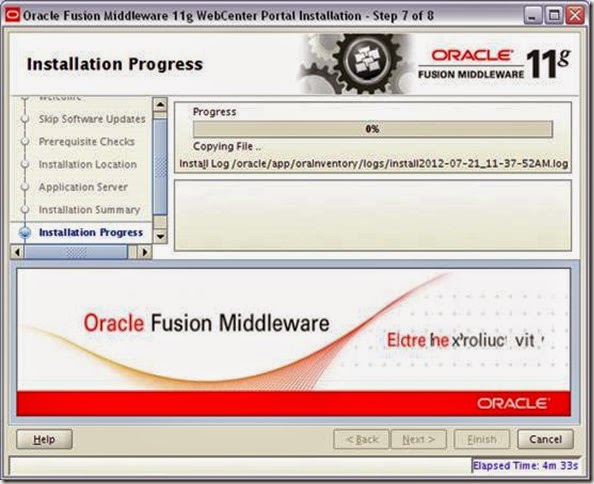
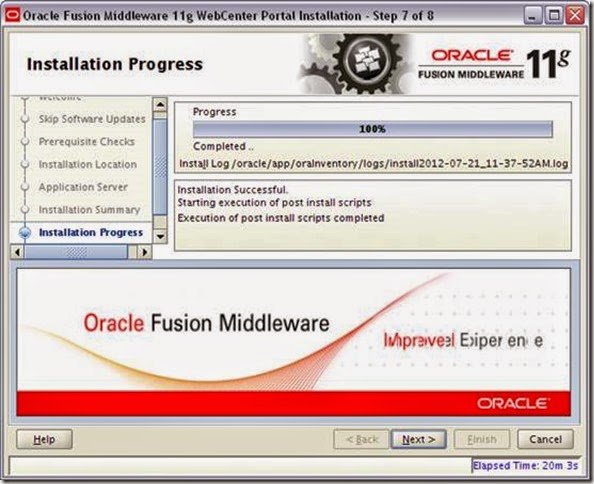
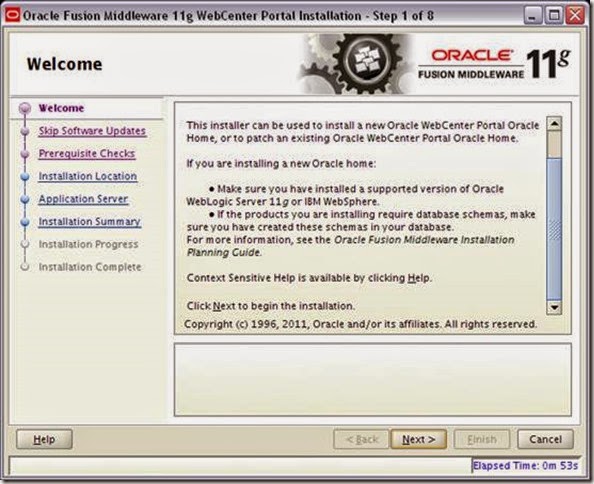
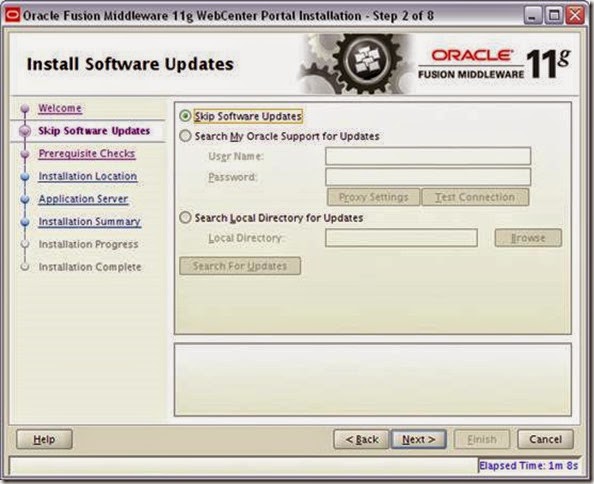
Invoke product installer:

/oracle/source/OFM11gR1/wcp_11.1.1.6/Disk1 -Djava.io.tmpdir=/oracle/app -jreLoc /oracle/app/jrockit-jdk1.6.0_24
clip_image002

clip_image004

clip_image006

clip_image008

clip_image010

clip_image012

clip_image014

clip_image016

clip_image018

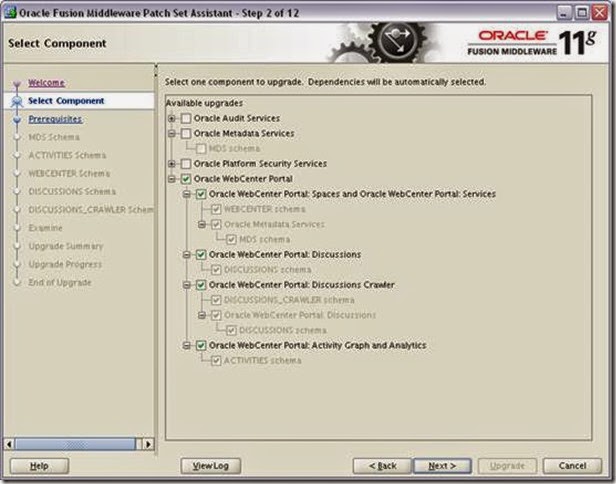
1.5 Database Schema Upgrade:

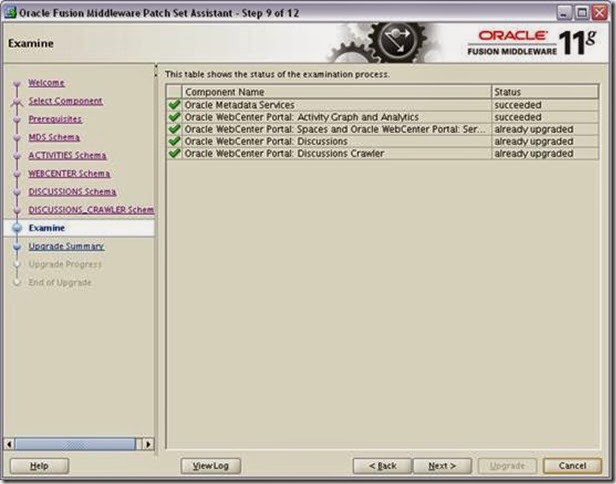
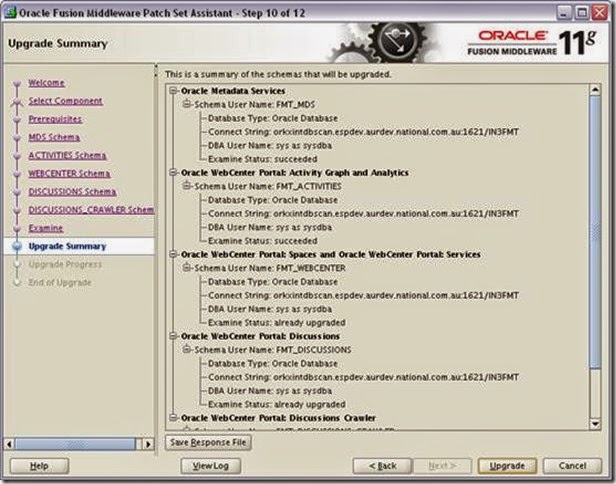
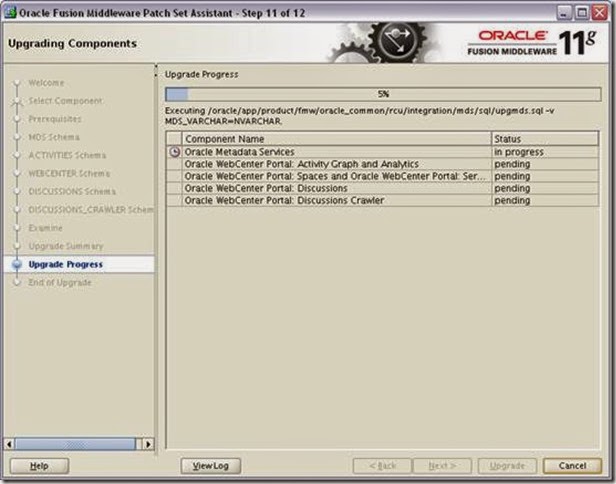
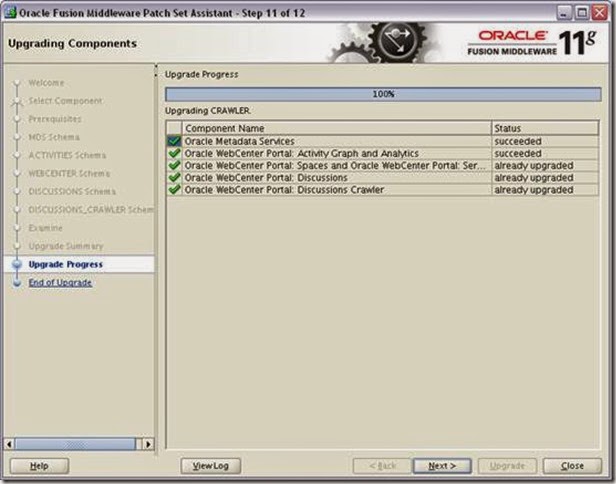
Database schema upgrade using patch set assistant:

1) Ensure all processes are down.

2) Get the database administrator to run the below commands :

SQL> select owner, version, status, upgraded from schema_version_registry;

OWNER VERSION STATUS UP

FMT_ACTIVITIES 11.1.1.4.0 VALID N

FMT_DISCUSSIONS 11.1.1.4.0 VALID N

FMT_DISCUSSIONS_CRAWLER 11.1.1.4.0 VALID N

FMT_MDS 11.1.1.4.0 VALID N

FMT_PORTLET 11.1.1.2.0 VALID N

FMT_WEBCENTER 11.1.1.4.0 VALID N

SELECT owner, object_name FROM all_objects WHERE status='INVALID';

no rows selected

Note: the above is to ensure that there are no invalid objects. If any present , then ask the DBA to recompile the object and make it valid.

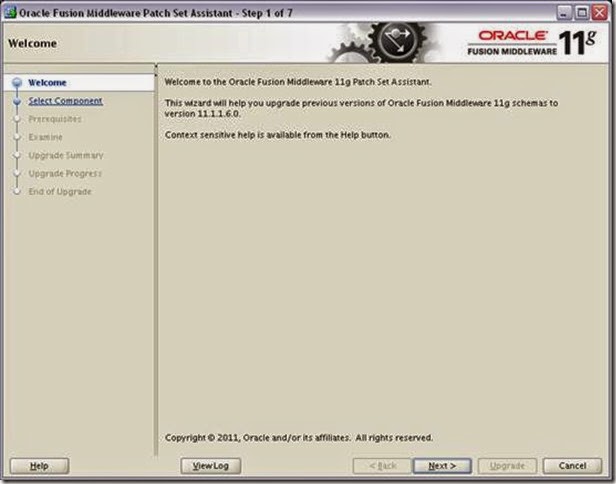
Running Patch Set Assistant GUI:

cd MW_HOME/oracle_common/bin

./psa

Note: The below requires SYS Password. So ensure the DBA is close by to provide the same.
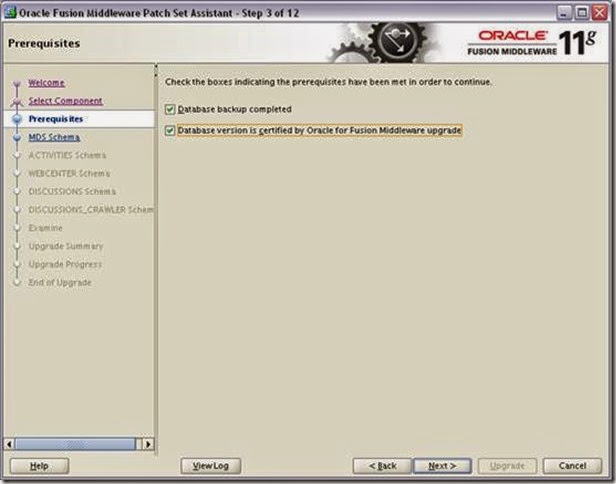
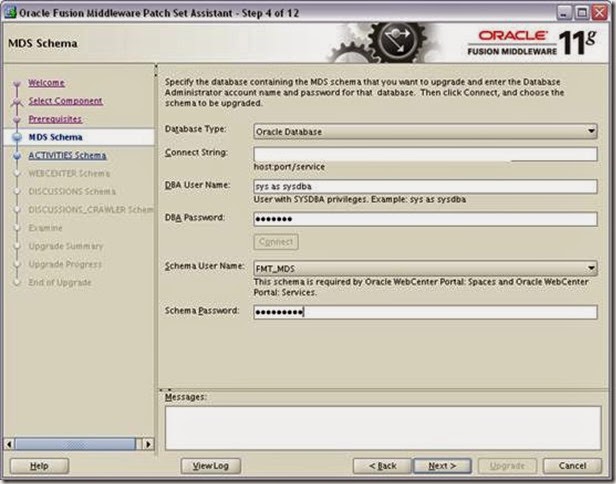
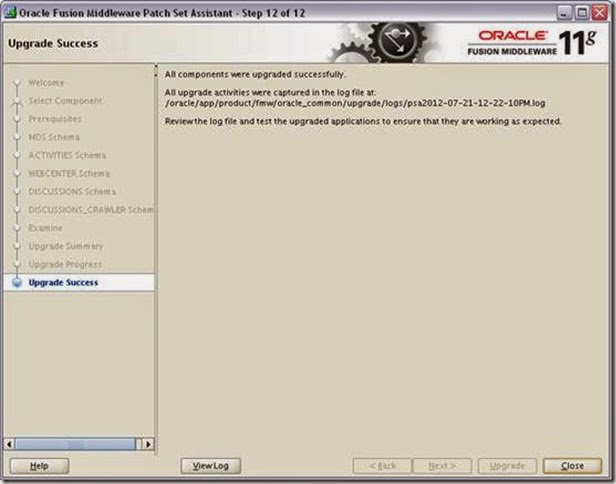
clip_image020

clip_image022

clip_image024

clip_image026

clip_image028

clip_image030

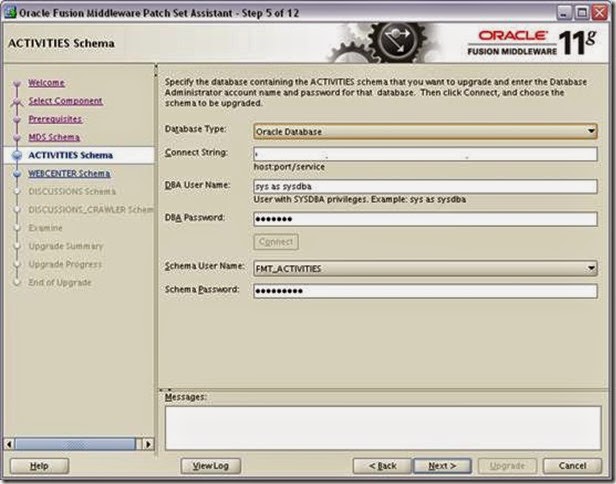
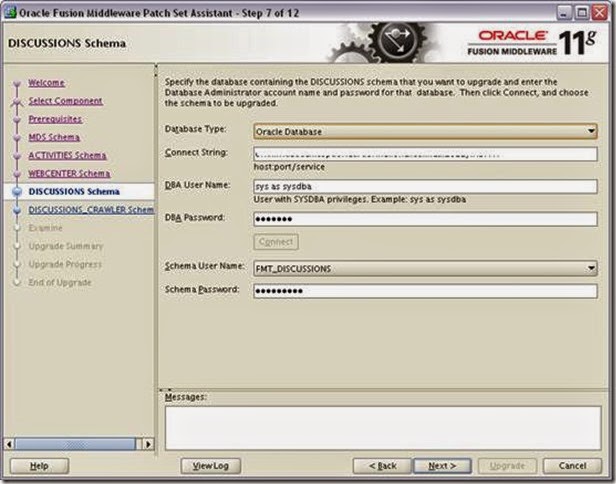
Enter the Connect String as per environment
clip_image032

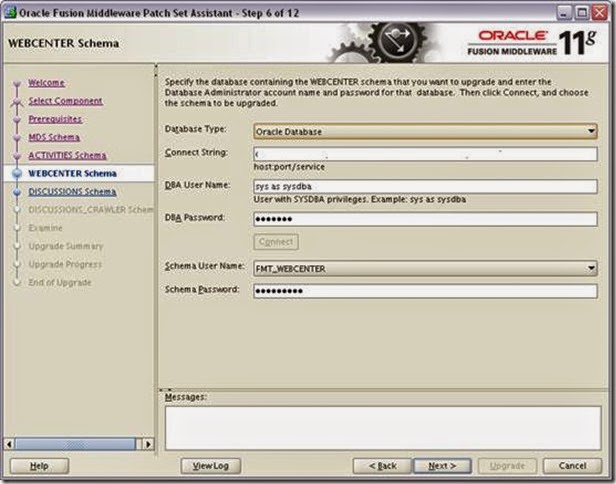
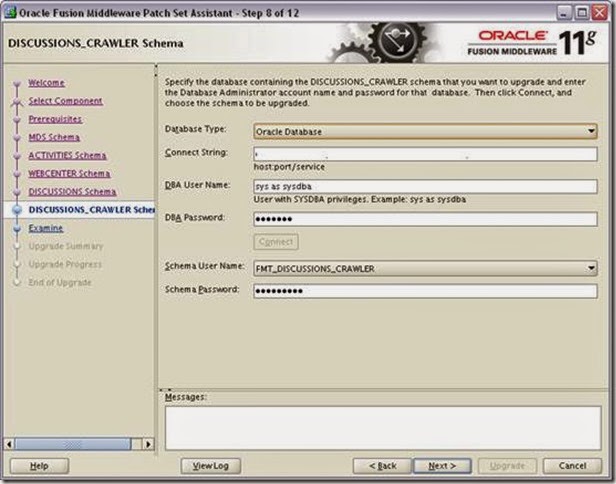
Enter the Connect string as per environment
clip_image034

clip_image036

clip_image038

clip_image040

clip_image042

clip_image044

Now get the Database Admin to run the below and ensure the version has been upgrade to 11.1.1.6 :

SQL> select owner, version, status, upgraded from schema_version_registry;

OWNER VERSION STATUS U

------------------------------ ------------------------------ ----------- -------------------------------

FMT_ACTIVITIES 11.1.1.6.0 VALID Y

FMT_DISCUSSIONS 11.1.1.4.0 VALID N

FMT_DISCUSSIONS_CRAWLER 11.1.1.4.0 VALID N

FMT_MDS 11.1.1.6.0 VALID Y

FMT_PORTLET 11.1.1.2.0 VALID N

FMT_WEBCENTER 11.1.1.4.0 VALID N


Patch Installation- patch 13788861:

Copy and unzip below patch on the server.

/oracle/source/OFM11gR1/wcp_11.1.1.6/ p13788861_111160_Generic.zip

Prerequisites:

--------------

1. Before applying non-mandatory patches, check whether you have the exact symptoms

described in the bug.

2. Review and download the latest version of OPatch 11.1.x via Bug 6880880.

(OPatch version 11.1.0.8.3)

Oracle recommends that all customers be on the latest version of OPatch.

Please review the following My Oracle Support note and follow the instructions

to update to the latest version if needed:

Note 224346.1 - Opatch - Where Can I Find the Latest Version of Opatch?

NOTE: This is only required the first time the one off patch is applied

or if there is a new opatch version available.

3. Verify the OUI Inventory.

OPatch needs access to a valid OUI inventory to apply patches.

Validate the OUI inventory with the following command:

- opatch lsinventory

If the command errors out, contact Oracle Support and work to validate

and verify the inventory setup before proceeding.

4. Confirm executables appear in your system PATH.

The patching process will use the unzip and the opatch executables. After

setting the ORACLE_HOME environment, confirm both of these exist before

continuing:

- "which opatch"

- "which unzip"

If either of these executables do not show in the PATH, correct the problem

before proceeding.

5. Set the ORACLE_HOME environment variable to "MW_HOME/oracle_common" home.

- Stop all servers (AdminServer and all Managed server(s))

- Set your current directory to the directory where the patch is located.

-

Execution Steps:

[oracle@ 13788861]$ export ORACLE_HOME =/oracle/app/product/fmw/oracle_common

[oracle@ 13788861]$ echo $ORACLE_HOME

/oracle/app/product/fmw/oracle_common/

[oracle@ 13788861]$ opatch apply

Invoking OPatch 11.1.0.8.5

Oracle Interim Patch Installer version 11.1.0.8.5

Copyright (c) 2011, Oracle Corporation. All rights reserved.

Oracle Home : /oracle/app/product/fmw/oracle_common

Central Inventory : /oracle/app/oraInventory

from : /etc/oraInst.loc

OPatch version : 11.1.0.8.5

OUI version : 11.1.0.9.0

OUI location : /oracle/app/product/fmw/oracle_common//oui

Log file location : /oracle/app/product/fmw/oracle_common/cfgtoollogs/opatch/opatch2012-07-21_16-05-18PM.log

Patch history file: /oracle/app/product/fmw/oracle_common/cfgtoollogs/opatch/opatch_history.txt

OPatch detects the Middleware Home as "/oracle/app/product/fmw"

ApplySession applying interim patch '13788861' to OH '/oracle/app/product/fmw/oracle_common'

Running prerequisite checks...

Provide your email address to be informed of security issues, install and

initiate Oracle Configuration Manager. Easier for you if you use your My

Oracle Support Email address/User Name.

Visit http://www.oracle.com/support/policies.html for details.

Email address/User Name:

You have not provided an email address for notification of security issues.

Do you wish to remain uninformed of security issues ([Y]es, [N]o) [N]: Y

OPatch detected non-cluster Oracle Home from the inventory and will patch the local system only.

Please shutdown Oracle instances running out of this ORACLE_HOME on the local system.

(Oracle Home = '/oracle/app/product/fmw/oracle_common')

Is the local system ready for patching? [y|n]

y

User Responded with: Y

Backing up files and inventory (not for auto-rollback) for the Oracle Home

Backing up files affected by the patch '13788861' for restore. This might take a while...

Backing up files affected by the patch '13788861' for rollback. This might take a while...

Patching component oracle.jrf.javacache, 11.1.1.6.0...

Updating jar file "/oracle/app/product/fmw/oracle_common/modules/oracle.javacache_11.1.1/cache.jar" with "/modules/oracle.javacache_11.1.1/cache.jar/oracle/ias/cache/groupv2/MemberID.class"

ApplySession adding interim patch '13788861' to inventory

Verifying the update...

Inventory check OK: Patch ID 13788861 is registered in Oracle Home inventory with proper meta-data.

Files check OK: Files from Patch ID 13788861 are present in Oracle Home.

The local system has been patched and can be restarted.

OPatch succeeded.


Post Upgrade steps:

A) For each WebLogic Server domain, you must run the upgradeJRF() WLST command to update the shared libraries in your domain:

  1. Stop all running instances, Managed Servers, Administration Server, and Node Manager in the domain. See "Starting and Stopping Oracle Fusion Middleware" in Oracle Fusion Middleware Administrator's Guide for more information.
  2. Start WLST.

cd oracle_common/common/bin

./wlst.sh

wls:/offline> upgradeJRF('/oracle/app/product/fmw/user_projects/domains/obiee_domain')

upgradeJRF: skip, JRF is up-to-date.

B) For each WebLogic Server domain, you must run the upgradeOpss() WLST command to update your configurations and stores from previous releases to Release 11.1.1.6.0 configurations and stores using a system-jazn-data file in Release 11.1.1.6.0.

Before running this command, start WLST as shown below:

cd MW_HOME/oracle_common/common/bin

./wlst.sh

upgradeOpss(jpsConfig="existing_jps_config_file", jaznData="system_jazn_data_file")

wls:/offline> upgradeJRF('/oracle/app/product/fmw/user_projects/domains/fmt_domain')

upgradeJRF: skip, JRF is up-to-date.

wls:/offline>upgradeOpss(jpsConfig="/oracle/app/product/fmw/user_projects/domains/fmt_domain/config/fmwconfig/jps-config.xml", jaznData="/oracle/app/product/fmw/oracle_common/modules/oracle.jps_11.1.1/domain_config/system-jazn-data.xml")

{auditStore=null, password=null, user=null, url=null, jdbcDriver=null, jaznData=/oracle/app/product/fmw/oracle_common/modules/oracle.jps_11.1.1/domain_config/system-jazn-data.xml, jpsConfig=/oracle/app/product/fmw/user_projects/domains/fmt_domain/config/fmwconfig/jps-config.xml}

Starting upgrade of opss configuration and security stores.

WLS ManagedService is not up running. Fall back to use system properties for configuration.

Upgrade of opss configuration and security stores is done.

How to Install and Configure Webcenter11g


WebCenter-- version 11.1.1.4.0

Pre Requisites

Firewall rules to DB on port 1621 should be open

Webcenter schemas in db has to be created by running RCU 11.1.1.4.0

Pre-Requisite Software Installation

Pre-requisite softwares needs to be installed as oracle user in AdminServer and Tier2 Webcenter servers.

· Copy JRockit binary jrrt-4.0.1-1.6.0-linux-x64.bin to /oracle/app folder

· Copy WebLogic10.3.4 binary wls1034_generic.jar from NAS /oracle/source/OFM11gR1to /oracle/app folder

· Copy WebLogic10.3.4 installation scripts wls1034_generic.xml, weblogic_base.sh to /oracle/app

· Copy WebCenter binary folder ofm_wc_generic_11.1.1.4.0 from NAS /oracle/source/OFM11gR1/ to /oracle/app folder

· Copy WebCenter11.1.1.4.0 installation scripts wc_base.sh, ofm_wc_generic_11.1.1.4.0_install.rsp to /oracle/app

· Install jrrt-4.0.1-1.6.0 by running ./jrrt-4.0.1-1.6.0-linux-x64.bin from /oracle/app folder

· Install WebLogic10.3.4 by running ./weblogic_base.sh from /oracle/app folder.

Install Webcenter11.1.1.4.0 by running ./wc_base.sh from /oracle/app folder

Domain Configuration

Domain needs to be configured as oracle user in AdminServer.

Navigate to <webcenter home location>/common/bin and execute the .config.sh

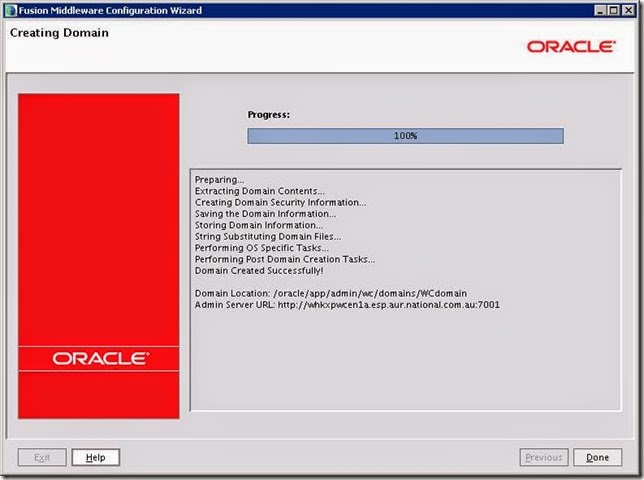
And follow the step by step as mentioned in below screens

clip_image004

clip_image006

Select as per above screenshot and click Next.

clip_image008

clip_image010

clip_image012

Select the appropriate mode, and the available JDK and click Next.

clip_image014

Select as above screenshot and click Next.

2[4]

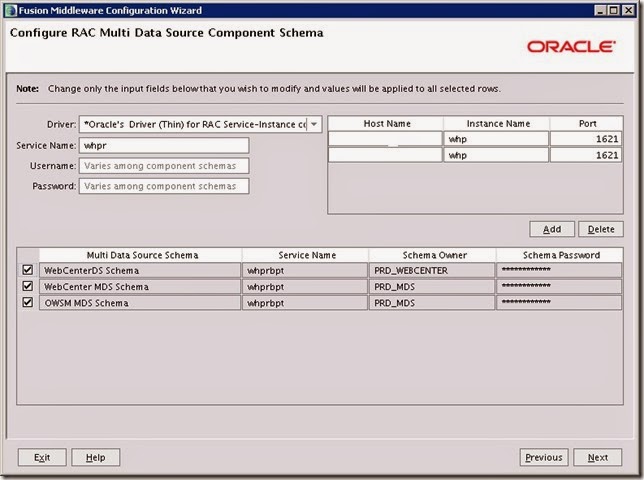
Enter the schema details and click Next.2

clip_image018

clip_image020

Select as above and click Next.

clip_image022


Add managed servers as above and click Next.

image

clip_image026

clip_image028

Configure Cluster as above and click Next.

clip_image030

Assign servers to the cluster from left hand pane to right hand pane and click Next.

clip_image032

clip_image034

image

Configure machine as above and click Next.

clip_image038

Assign the managed servers to the machines and click Next.

clip_image040

clip_image042

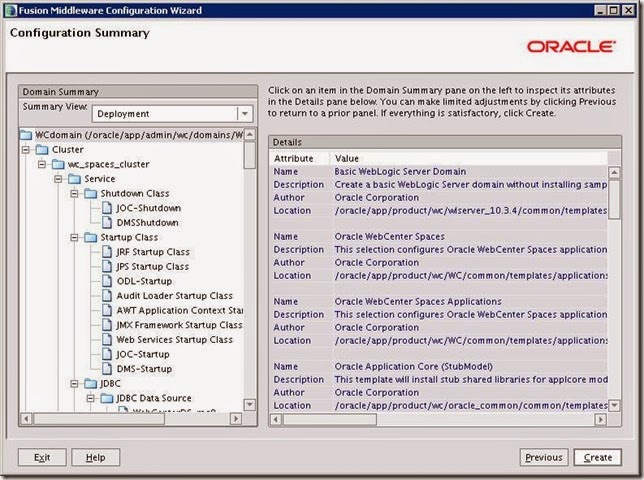
Click Next.

clip_image044

Click Next.

clip_image046

Click Create.

clip_image048

Click Done.

Start the AdminServer in the AdminServer node, if AdminServer startup throws authentication error, create AdminServer security folder and create boot.properties.

Assign memory arguments for AdminServer in startWebLogic.sh as below.

MEM_ARGS="-Xms1024m -Xmx1024m"

export MEM_ARGS

Pack Domain In AdminServer Node

Pack domain in admin server as follows.

cd /oracle/app/product1/wc/WC/common/bin

./pack.sh -template=wc_template.jar -template_name=wc_template.jar -domain=/oracle/app/admin/wc/domains/WCdomain/

clip_image050

UnPack Domain In Tier2 Managed Nodes

UnPack domain in other managed server as follows.

scp the wc_template.jar from directory /oracle/app/product/wc/WC/common/bin from admin server to Tier2 Webcenter servers to directory /oracle/app/product/wc/WC/common/bin.

mkdir -p /oracle/app/admin/wc/domains/WCdomain/

cd /oracle/app/product/wc/WC/common/bin

./unpack.sh -template=wc_template.jar -domain=/oracle/app/admin/wc/domains/WCdomain/

clip_image052

Once domain is unpacked, start the managed servers, if managed server startup throws authentication error, create managed server security folder and create boot.properties.

Security folder has to be created in /<domain home>/servers/<managed server name>/security

boot.properties has to be created in /<domain home>/servers/<managed server name>/security folder

ie: mkdir -p /oracle/app/admin/wc/domains/WCdomain/servers/WC_Spaces1/security

ie: vi /oracle/app/admin/wc/domains/WCdomain/servers/WC_Spaces1/security /boot.properties

Assign memory arguments for managed servers in startWebLogic.sh as below.

MEM_ARGS="-Xms4096m –Xmx4096m"

export MEM_ARGS

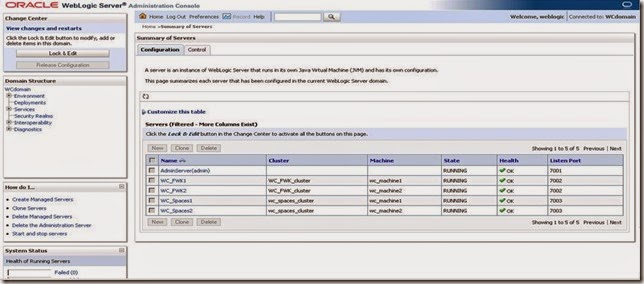
Creating WC_FWK custom managed Server

Create WC_FWK managed servers and WC_FWK_cluster manually by clicking New from the Servers in WebLogic Admin console.

clip_image054

Cluster Address In WebLogic

Once SSL is configured, add the cluster address  needs to be updated as hostnames:xxxx(port),hostname2:XXXX(port) then restart all the managed servers.

Assigning Libraries and classes to custom managed server

Assign the following deployments to WC_FWK_cluster also from the deployments in the WebLogic admin console.

adf.oracle.businesseditor

adf.oracle.domain

adf.oracle.domain.webapp

DMS Application

Jsf(1.2,1.2.9.0)

Jstl(1.2,1.2.0.1)

Ohw-rcf(5,5.0)

Ohw-uix(5,5.0)

oracle.adf.dconfigbeans(1.0, 11.1.1.2.0)

oracle.adf.desktopintegration(1.0, 11.1.1.2.0)

oracle.adf.desktopintegration.model(1.0, 11.1.1.2.0)

oracle.adf.management(1.0, 11.1.1.2.0)

oracle.dconfig-infra(11, 11.1.1.1.0)

oracle.jrf.system.filter

oracle.jsp.next(11.1.1, 11.1.1)

oracle.pwdgen(11.1.1, 11.1.1.2.0)

oracle.wsm.seedpolicies(11.1.1,11.1.1)

orai18n-adf(11,11.1.1.1.0)

UIX(11,11.1.1.1.0)

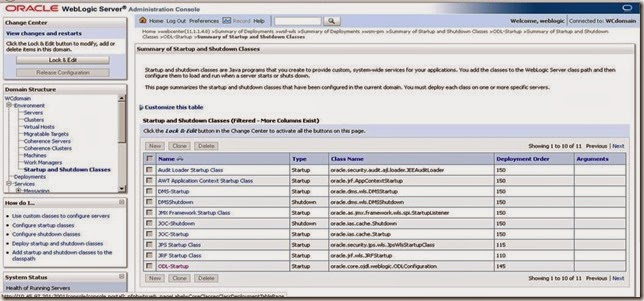
Assign all the classes available in Startup and Shutdown Classes in WebLogic admin console to WC_FWK_Cluster also.

clip_image058

Restart AdminServer and managed server after this.